Blue Ridge Overland Gear Tool Bag

I purchased a 2020 Toyota Tacoma SR 4×4 last year and I’m loving it. I have run into a few instances of other people not being prepared with basic tools or “self recovery” type of items. Over the past year, I have purchased some basic items to keep in my truck for myself or others.

Here are a few examples of things I have stored in the cab of the vehicle: First Aid Kit, flashlight, Leatherman, small knife, spare fuses, a small fire extinguisher, extra water, jumper cables, a portable (plug in) air compressor to fill up tires low on air, a recovery strap to have myself pulled out or to assist others, some extra food, and things to stay warm and dry.

I noticed I don’t have ANY tools with me and the more I’m out and about off the beaten path (the truck IS four wheel drive), I DID think it was a good idea to carry some basic tool for me and others to use should the need arise.

First off, I’m not a mechanic or much more than an entry level handyman. I’m confident where my comfort level ends and calling someone else begins. I’m not going to pull the engine or rebuild the axles in the mud. However, I should be able to tighten things that have come loose or do some basic repair to get me to cell coverage where I can call in reinforcements.

I found the Blue Ridge Overland Gear Tool Bag on YouTube – actually from a Jeep channel. I was intrigued and REALLY liked how modular and convenient it is to carry everything I should need with one set of handles. It is made from really heavy duty material and I don’t see it falling apart anywhere in the near future!

The tool bag is a bit pricey ($169.99 as of 11/28/2022) but I think it’s worth every penny. . Here is a link to the Tool Bag: https://www.blueridgeoverlandgear.com/products/tool-bag

Here is a video review of what I currently have in my Tool Bag: https://www.youtube.com/watch?v=xL3bP8VWVVI&t=2s

As covered in the video, the tool bag fully loaded weighs just over 25 pounds, but has most any tool I would need.

Have I forgotten something? Tacoma owners or anyone else more experienced than me – what would you add or change? I would appreciate your feedback and input.

Posted in Gear Review | Tagged | Leave a comment

How I quickly set up my hammock tarp

In this video, I demonstrate how I quickly set up my hammock tarp.

Here is a list of the items discussed in this video:

Tarp: Hammock Gear standard tarp with doors (camo): https://hammockgear.com/dyneema-fiber-standard-tarp-with-doors/

Dutch hook (used on one end of ridgeline): https://dutchwaregear.com/product/ti-dutch-hooks/

Tarp Flyz (used at one end of ridgeline): https://dutchwaregear.com/product/tarp-flyz/?attribute_pa_tarp_flyz=77-hardwareonly

Split rings (used to attach Flyz and cord loop to ridgeline of the tarp): https://dutchwaregear.com/product/titanium-split-rings/?attribute_pa_size=26-34inch

Tie out line (I used a total of 50 feet between all tie out points): https://dutchwaregear.com/product/reflect-it/?attribute_pa_color=29-green

Corner tie out with shock cord and tarp worms: https://hammockgear.com/dyneema-fiber-standard-tarp-with-doors/

Shock cord (used for tarp doors): https://dutchwaregear.com/product/shock-cord/?attribute_pa_shock_cord_diameter=34-332

Shock cord hooks (used at end of line for door line): https://dutchwaregear.com/product/shockcord-hooks/

Titanium stakes: https://dutchwaregear.com/product/ti-burly-hook-stake/

Posted in Backpacking, Beginner Series, DIY, Hammock Camping | Leave a comment

2nd attempt with video (what and how I carry when backpacking for an overnight trip)

I recently upgraded to an iPhone 12 so i thought I’d try to upload a video. This video was recorded and edited solely on my iPhone.

In this video, I show my typical load for a moderate weather overnight trip. I share what I use and how I store everything by showing everything by slowly unpacking and showing each item.

For this trip, everything (including food and water) weighs only 20.8 pounds.

I do realize I say “ummm” WAY too much. Suggestions and feedback are appreciated!

Posted in Backpacking | Leave a comment

Initial Impressions of Big Agnes Air Core Ultra Sleeping Pad

I recently had my first recent section hike of the Appalachian Trail. A portion of the trail (over 70 miles) passes through the Smoky Mountains and section hikers are required to make reservations and sleep in the shelters. I’m primarily a hammock camper, so I did not have a sleeping pad and borrowed one from one of my fellow hikers. While I was grateful for his generosity, I quickly learned a few valuable lessons. First, I need to purchase a thicker pad for the occasions I need to use one. The second lesson I learned was it needed to be comfortable. The final lesson is that using the top quilt I use in the hammock has some challenges when using a sleeping pad. After lots of research, trying several different makes and models at the local REI store, I finally purchased the Big Agnes Air Core Ultra Sleeping Pad in a Wide Regular size. (https://www.rei.com/rei-garage/product/169362/big-agnes-air-core-ultra-sleeping-pad-wide)

Here are the basic details according to the package: the measurements of the pad are 25” x 72”, the thickness is a maximum of 3.5”, stored (rolled) size is 4” x 8.5”, and the weight is 23 oz.  According to the package, this model is for “warm weather” and to be used above 35 degrees Fahrenheit. It includes a storage bag, a spare inflation valve, and a small patch kit. After several naps inside and one overnight use in the back yard, here are my initial impressions of Big Agnes Air Core Ultra Sleeping Pad.

There are quite a few things I like about this pad. This pad is comfortable! I primarily sleep on my side and this pad allowed me to sleep on my side without feeling the ground through the pad. It is long and wide enough for me to sleep comfortably with worrying about rolling off. I can lie in a more normal sleeping position instead of being pencil straight due to the 25” width. The pad deflates quickly allowing for quick folding and storage when packing up. I used to hate trying to squeeze all the air out of an inflatable pad and that is not a problem with this one. The reason is there are separate openings for inflation (one way valve) and deflation (just a hole without a valve). For the size and thickness of the inflated pad, I think the stored (deflated) size and weight are more than appropriate – especially for the size and price. I purchased this pad on sale at REI for just under $60 including free shipping with an additional 20% off coupon I received in my email.  It is easy to deflate this pad slightly for a “softer feel” while using it by using the one way valve on the inflation hole and using a VERY light touch.

There are a few things I don’t like about this pad. Because of the volume, it does take quite a few full breaths (30 or so) to inflate. Take your time or you will feel light headed. I found that breathing normal (inhaling through nose and exhaling into the pad) worked best for me, although it still took a few minutes. On the model I purchased the storage bag is not designed to assist with inflation as some of the other Big Agnes models, although I think all the new (2020) versions come with one. This would be a great improvement in my opinion. I wish it was rated for just a few degrees lower. According to their website, the R rating is only 1.4 for the new and improved Air Core Ultra 2 (https://www.bigagnes.com/Air-Core-Ultra_2). I should have done more research and may end up purchasing the insulated version of this pad.

While this sleeping pad isn’t absolutely quiet, I didn’t find it especially noisy. It is definitely NOT “chip bag crinkly” like some of the other models I have tested. I didn’t find this sleeping bad especially slippery, either. But I did cheat a little.  Since I was at home, I inserted the sleeping bag into a spare sleeping bag liner I had in my gear bin. I don’t know if I would carry this extra weight on a long trip, but it seemed to work well at home to reduce movement noise and slipperiness of the pad.

On my last top quilt and ground pad experience, I had issues with the top quilt wanting to wander off during the night. To assist keeping the top quilt from slipping off the pad, I also purchased a set of ground pad attachment kit from Hammock Gear (https://hammockgear.com/ground-pad-attachment-kit/). It’s basically a set of mitten hooks on adjustable shock cord loops that go around your pad and attaches to your top quilt. They worked brilliantly and cost a $2.99 for a set of three. It was well worth the money since I did not have any of the items to make these at home. If you have the right materials, it would be very easy to make a set.  I HIGHLY suggest using something like this if you have a top quilt instead of a sleeping bag.

Am I overall pleased with my purchase? Yes. It is not the lightest, warmest, or least expensive sleeping pad on the market, but it will allow me to sleep comfortably on my side, with my top quilt, while not breaking the bank or being too heavy for my personal pack weight. I will pack it on trips that I know it will be used and look forward to being comfortable and having quality sleep when using it.

Here are the pictures from the item I actually received.

Weight of package as received (pounds and ounces)
Storage bag, sleeping pad, patch kit and spare inflation valve
Weight of pad only (pounds and ounces)
Rolled size compared to 1 L Smart Water bottle
Posted in Backpacking, Gear Review | Leave a comment

Initial impressions of the Thrupack Summit Bum – Pocket

One of my goals in the past few years has been a lighter pack weight and to hike more efficiently.  I am pretty happy with my pack weight and gear. My base weight (everything except food and water) for cold weather (a little below freezing in my area) is around 16 pounds. I have been eyeing a Dyneema hammock tarp that will save me nearly 10 ounces, though…. My pack weight can be a little lighter or heaver depending on the trip and weather conditions. Now I’m working on more efficient hiking.

One of the keys to efficient hiking is keeping a steady pace throughout the day.  I found that every time I had to stop and take of my pack to access something, I ended up stopping for longer than I really wanted. I’ve also transitioned from convertible pants to shorts in warmer weather and when hiking maintained trails. By converting to shorts, I lost the storage space from the cargo pockets I used to store a few items. I also wasn’t crazy about the feeling of items “swinging” in my cargo pockets as I hiked. Because of these reasons, I recently purchased several items from Thrupack. The main item was the Summit Bum – Pocket which includes a 1” webbing strap. I also ordered the small white Thrupack zip to use as a trail wallet, and a set of Thrubiners that enables various carrying configurations. The total cost was $63 USD with free shipping.

I received these items recently and thought I would share my initial reactions. My intention is to wear the Thrupack – Pocket as a fanny pack either by wearing the included belt, or using the Thrubiners to attach to the waist belt on my ULA Ohm 2.0. I have not decided which method I will use. In the Summit Bum – Pocket I plan on storing items I will need throughout the day hopefully eliminating the need to take off my backpack. Planned items include food/snacks, water treatment, gloves, hat, camera, or any other items I readily need throughout the day and will not fit in my hip belt pockets. I’m sure as I actually use it the items it contains will evolve until I find the perfect fit. This is my initial impression only of the items.

A few days after my order, I received an email with tracking information and the package was delivered in a standard black plastic envelope. All of my items were shipped and included was a small Thrupack Sticker and a small blue dinosaur. After receiving my package, I visited Thrupack’s website (www.thrupack.com) and didn’t see any reference to this small addition or a back story. Do any of my readers have a reference for the blue dinosaur? Since I’m kind of boring, I ordered the Summit Bum in the Black Gridstop with the black mesh pocket.

Upon arrival, I inspected all items and they were top quality items. The stitching was perfect with no obvious defects. The Summit Bum – Pocket by itself came in at a weight of 3.2 oz.

Including the strap (1.3 oz).

The total weight of the Summit Bum – Pocket and strap weighed 4.6 oz.

The Summit Bum – Pocket, 1” webbing strap and buckle, and small Thrupack Zip weighed 4.8 oz.

The small Thrupack zip came with a separate Thrubiner and weighed 0.4 oz.

The 2 Thrubiners weighed a total of 0.3 oz.

All items (Summit Bum – Pocket, 1” strap with buckle, and 2 small Thrubiners weighed 5.1 oz. This does not include the Thrubiner that is included with the Thrupack zip.

The additional dinosaur weighed 0.01 oz just in case you were curious.

Here is everything I received minus the packing material.

There is a mitten hook and two pockets inside the Summit Bum – Pocket.

I plan on using the mitten hook to attach the small Thrupack zip to use as my trail wallet. It is just large for my ID, debit/ credit card, and some cash.

There is plenty of room inside. This is the interior with one Talenti Sorbet container stored inside horizontally. There is still plenty of room on top of the container.

Two Talenti Sorbet containers will fit inside horizontally.

Here I have attached the two Thrubiners to the small loops if I attach to my hip belt.

The hip belt is easily routed through the padded slot in the Thrupack Summit Bum. Since the hip belt isn’t n attached, the buckle can be placed under the padded section for comfort.

So far, I’m impressed with the quality of this product and I look forward to using it to keep me organized and prevent me from removing my pack at short breaks. I’m a bit OCD when organizing my backpacking gear and for such a small item, there was a lot of thought put into the design.

The main reason I preferred this item over several other models was the design. The Summit Bum has several compartments instead of just having one large pouch. There is a mesh pocket on the front which is designed to prevent items from falling out. The main compartment also has two pockets stitched on the inside for storing small items. In addition, there is a large storage area on top between the padded area and the main storage compartment.

I can now separate items i need while hiking between my hip belt pockets and the Summit Bum and be more organized. By not removing my pack, this will give me more hours to hike per day.  It will also make having my essentials easily available – both on the trail and in town. Just like ounces make pounds, minutes make hours. The fewer times I have to remove my pack is the more hours I have to hike which means the more miles I can hike per day.

I will have an updated review of this item after I use it for a few miles and I will compare my perceived usage versus actual usage.

Posted in Backpacking, Gear Review, Hiking | 1 Comment

How to put in higher mileage days when backpacking

I will never set a speed record for long distance hiking, but I am always looking for ways to improve my overall hiking speed. I will share a few of the things I have learned in my years of backpacking and maybe it will help you, too.

There is only one way to know how far and fast you are able to hike. That is by repeated hiking. I would suggest doing a couple of things when you go hiking. First, know make notes of how many miles an hour you typically hike. This is a great starting point to know how many miles you are able to cover in any given time frame. Second, become comfortable with your skills and gear. This will typically give you the confidence to either know your gear will perform as intended and/or know what items you can live without while you are on the trail. Hopefully during this process you learn what gear works for you and you are able to find shoes, socks, and clothes that are comfortable and prevent/reduce chaffing and blisters. The third thing that hiking does is getting you in “hiking shape.” While working out or going to the gym is great, nothing really prepares you for hiking but going on training hikes.

When planning a trip, research and know the terrain you plan on covering and compare that to mileage covered on similar terrain on past trips. This will be a starting point. Please don’t go hiking blindly without doing your research ahead of time. Climbing uphill or challenging terrain (very rocky, slippery, and going off trail) will require more time, energy, and calories to cover in relation to easier terrain.

How much weight are you carrying? Generally speaking, the less weight you carry, the faster you are able to hike. Less weight makes hiking more enjoyable. More weight makes camping more enjoyable. Decide which is more important before you leave. PLEASE ensure you are carrying the essential items you need to survive. This is different for every person and the conditions, but don’t lighten your pack too much and put yourself in danger or needing to be rescued for the sake of having a lighter pack weight. If you are doing a multiday trip, do you plan on carrying all of your food (more weight) or are there resupply points along the way (require more time)? If there are resupply points, what are the operating hours and what do they offer in resupply options? How far are the resupply points from the trail? All of these will affect how many miles you are able to hike in a day.

Let’s assume you have done all of the things listed above. What else can be done to increase the mileage you cover in a hiking day? To me, it comes down to being efficient. The less time I spend NOT hiking is more time I can be adding miles to my day. Let’s assume you also have your backpack, shoes, clothes, food, and water treatment dialed in to near perfection. What are some practical things you can do to increase the miles per hour (mph) or miles per day (mpd) that you typically cover?

The first thing that will help you put in higher mileage days when backpacking is to get an early start out of camp. Instead of sleeping in and taking your time leaving camp, try to leave as early as possible. For some people this could be before sunrise while others it is midmorning. I prefer to leave camp just after sunrise. This allows me to have more hours of daylight for hiking. By doing this, it is easier to have half (or more) of the mileage completed by lunch instead of being in a rush or reaching camp after dark.

The second thing that will help you put in higher mileage days when backpacking is to plan for efficiency. There are several ways to easily do this. For example, I know where everything is in my backpack (and always pack it the same) so I don’t have to spend time looking (and not hiking) for something. I also pack in a way to avoid taking off my backpack to access something I know I’ll need as I’m hiking. When I put on my backpack every morning, I have access to everything I need throughout the day without requiring assistance or removing my backpack.

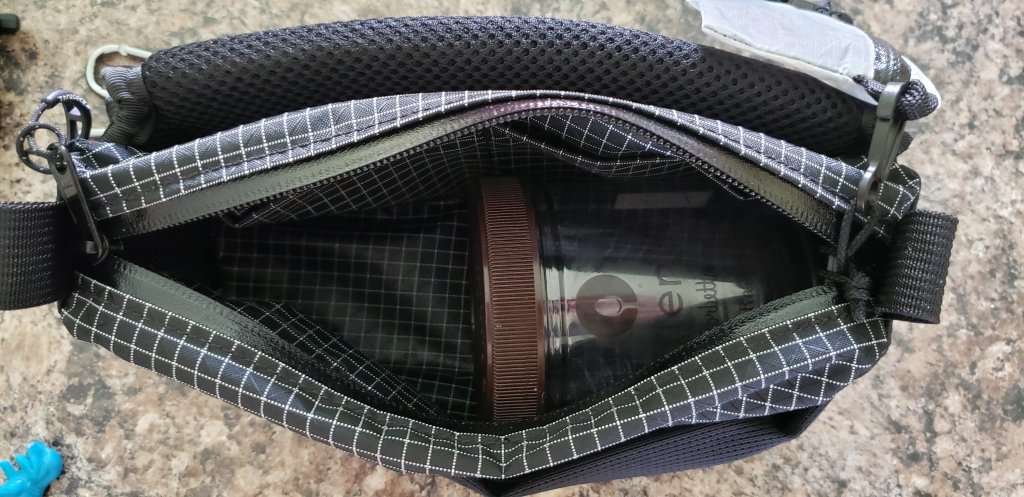
Can I access and store my water bottles without assistance? A surprising number of backpacks don’t allow this. I prefer 1 liter water bottles instead of a water bladder. There are several reason but the most important one is that I can easily monitor my water consumption and/or water remaining until the next water source. This is difficult when using a water bladder stored inside the backpack. I also use flip tops on my water bottles. I can drink on the go without worrying about dropping the lid. It seems silly, but I have spent many frustrating minutes looking for a water bottle lid I dropped in the leaves before I converted to the flip tops. My Sawyer Squeeze water filter (gravity system) is also secured on the outside of my pack.

I am also considering using Aqua Mira for hiking and my Sawyer squeeze for camp. I am comfortable with premixing my Aqua Mira for each day and have it easily accessible in a pocket after researching the quality of water and the pros and cons of this method. If I choose to do this, I can easily fill the 1 liter bottles at a water source, treat with liquid Aqua Mira drops and continue hiking without ever taking off my backpack. You will be amazed how much time this can save if you only need water. I have found that when I plan on only filtering water, I end up having a snack, taking off the backpack, etc. A quick water break turns into a much longer than needed break. It may seem unimportant, but any time spent not hiking is mileage not covered.

Another way to be efficient is what and when you eat.  All of my snacks and daytime food are easily accessible. Often, I snack and eat while I’m moving. This saves time and fuel because I rarely cook my lunch. Sometimes I plan for a prolonged lunch and I will do a “cold soak” lunch. I’ll add water to whatever I plan on eating for lunch midmorning and continue hiking. A short time later when I’m ready to eat, I will take a short break for lunch and eat the now rehydrated meal. Ensure you have enough liquids and calories for your body to burn. If you are doing a challenging hike, you will need more calories than when you are not hiking. If you don’t eat enough, you can burn out and not have the energy and feel overall too tired to continue.

The last efficiency tip is know the route, the mileage to the next water source, trail intersections or points of interest. I can look at the mileage I have covered and the time it has taken me without taking of my backpack and pulling out my map. I can quickly know if I need to speed up to cover my planned mileage or if I can slow down. This can be done without looking at a map. I should also be aware of how the trail is marked (or blazed), and if there are any reroutes or closures to avoid going down the wrong trail and/or in the wrong direction.

The third thing that will help you put in higher mileage days when backpacking is to keep moving. I know, that seems too obvious, doesn’t it? I have found that when facing a large uphill climb, smaller steps win the war. I “put it in low gear” and take smaller steps and really try not to stop. It is really a mental game. I learned this lesson recently in the Smokey Mountains of Southeastern United States. The uphill climbs were kicking my tail. As long as I was moving (even if it was slow), it was better than stopping. To make up time, I often speed up on the downhill descents. It’s like putting your car in neutral and letting it coast. It was easy walking and I made great time. It also felt good to stretch out the legs.

Not stopping is much easier to type than practice, but go further than you think you can. Your body will whine and complain and it will want you to stop. You didn’t begin this trip to stand in the woods, you are here to walk in the woods! Pick a time interval such as 10 minutes (or more), a landmark, POI, or a point visible in the distance and don’t stop until you pass it. You can slow down, but just don’t stop.

Determine if you want to stop or need to stop. Always ignore the wants. Seek discomfort and challenge yourself to do more. This is one area I’m really challenging myself to improve. When you do stop hiking for whatever reason, pay attention how long you spend on breaks. Several short 5 minute breaks (for a total of 15 minutes) in an hour can cut your hiking time by 25%. I’ll often plan for longer lunch breaks and set an alarm on my watch (or phone if I have it) to help me not stay still too long.

The fourth thing that will help you put in higher mileage days when backpacking is actually done when you are not hiking. On the trail, this is often done after reaching camp. To help recover from the hiking today and to prepare for tomorrow, you must spend some time in recovery. Sure, calories and hydration are important, but so is stretching and addressing any problem areas. Spend some time massaging and stretching out sore muscles and allowing your feet to air out if at all possible. Address any problem areas because the chances are they won’t improve overnight. I stretch at night and in the morning to loosen everything and to help my sore muscles feel better.

Do you want to hike farther than you are currently? Practice makes perfect. Know your gear. Set realistic goals based on terrain. Reduce your pack weight if possible and safe. Leave camp early. Plan for efficiency when packing, drinking, treating water, eating, and navigation. Keep moving and time your breaks.  Have a recovery plan to prepare you for sleeping well and hiking far the next day.

What tips do you have to help you hike farther?

Posted in Backpacking, Beginner Series, Helpful information, Hiking | Leave a comment

“Going to ground” from a hammock when backpacking

Recently, there have been several post in blogs and forums about “going to ground” from a hammock. If unfamiliar with this concept, it is the idea to go from hanging in a hammock to sleeping on the ground. Most often this is portrayed as an unplanned event – a backup plan. The only unplanned scenarios that would cause one to “go to ground” include failure of the hammock, failure of the suspension, or the inability to find suitable supports (normally trees) to suspend the hammock. Another (user error) reason could be leaving part of the hammock or hammock suspension at the previous night’s location or failure to pack one of these items.   

There may be some planned reasons to “go to ground.” One could be camping above the tree line or in an arid environment where there are no trees or suitable structures readily available. In some locations, attaching anything from a tree is against the rules such as in some National Parks and/or certain campgrounds. There may be other rules and regulations in effect. For example, all section hikers on the Appalachian Trail in the Smoky Mountains must sleep in a shelter. (If the shelter is full, thru hikers can set up outside the shelter.)

Let’s first address the planned scenarios that would cause “go to ground.’ As planning begins for a trip and before the first item is put into the backpack, do research. The rules and regulations of the intended destination should come before mileage, packing list, planned route, or anything else as it will determine what needs to be taken. The rules should never be a surprise. Most of the time, there is a phone number and/or email address available if the answer isn’t online. Is going to ground going to be a rare occasion or a possibility often? The rules, regulations, and/or plan may dictate the need to sleep on the ground every night from the beginning.

On a recent trip, there was going to be one night out of three that I had to “go to ground” in the Smoky Mountains. The first and last night were using backcountry campsites where hammocks are allowed, but the second night was going to be on the Appalachian Trail and we had to sleep in the shelter. The obvious decision was to decide between taking my hammock setup or taking a tent and sleeping pad.  I did neither…. I sleep much better in my hammock, so I decided to take my hammock and down quilts and borrow a sleeping pad for the one night. Yes, I carried the sleeping pad the entire trip…. The night in the shelter I used the borrowed sleeping pad and used my top quilt for insulation. I did sleep in the shelter, but not very well. I am a side sleeper so I was not comfortable as the pad was way too thin. The lesson learned was to save up and invest in a thick but lightweight sleeping pad. They do exist but are fairly expensive. This one from Big Agnes is on my wish list in the regular and wide size: https://www.rei.com/product/105158/big-agnes-q-core-slx-sleeping-pad. It weighs 20 ounces but to get great sleep it is worth the penalty to my wallet and pack weight when it is needed.

That is the only time since 2012 when I began sleeping in a hammock that I had to “go to ground.” I have NEVER had an unplanned “go to ground” experience. A quick caveat: there are plenty of trees and camping sites where I spend most of my nights outdoors.

The obvious questions are: “How is this possible?” and/or “Well, you never go camping so that is easy to say.” It is possible and I do go backpacking/camping at least several times a year. Here is the secret: I do have a small backup plan (or two), I pay attention to detail on the condition of my gear, and I’m sure a little bit of good luck has helped, too!

In the beginning of my hammock camping, I used an inflatable sleeping pad for insulation between me and the hammock. This was my backup plan if something failed. I would use the inflatable sleeping pad and the sleeping bag I was using as my top insulation. When I upgraded to down top quilt and a down under quilt, things became a little more interesting regarding “going to ground.”

The first thing I do is ensure I have all parts of my hammock and suspension before it is placed in my backpack. I never assume both of my tree straps are in the bag with my hammock. I always check to make sure. This is good for the first night or location. The second thing I do is taking care of my gear while I’m out in the woods. I make sure nothing sharp is beneath my hammock when I set it up such as thorns or small branches with pointy ends. I also make sure I have nothing that could puncture my hammock in my pockets or in the hammock before I get into it. The third thing I do is when I preparing to leave each location. As soon as my backpack is fully loaded, I check back over my area to make sure I don’t leave anything. I check for stakes, tree straps, or any other small item that may have fallen out of my pack or one of my pockets. Before I hike off, I often turn around and do a final check. Yes, I have found a thing or two on several occasions. The fourth thing I do is after the backpacking trip. As I’m airing out my gear and/or cleaning it, I pay close attention to the integrity of my hammock and suspension to see if there are any parts that are wearing or needing replacement.

While I think the last paragraph can go a long way to ensure you are not surprised, things happen. I carry two items that can help if I ever have to “go to ground.” The first item is my belt. It is a cinch belt that can be used to extend my tree strap if needed or replace a broken (or lost) tree strap. It cost $10 USD, weighs 2.0 ounces, is 48 inches long, and is made of 1” polyester with a breaking strength of 1500 pounds. I purchased it several years ago here: https://www.dreamhammock.com/shop.html#!/Cinch-Belt/p/27766923/category=4019214 I have never had to use it but one of my hiking buddies did once and it saved the overnight trip.

The second thing I carry to help if I ever have to “go to ground” is a small piece of closed cell foam from a cheap sleeping pad such as this one: https://www.walmart.com/ip/Ozark-Trail-Closed-Cell-Foam-Blue-Camp-Sleeping-Pad/634956813  I use an ULA Ohm 2.0 which is an internal frame backpack with a VERY thin piece of foam that comes with it. I took out the thin foam, traced the shape onto the sleeping pad foam and cut it out. I use the thicker foam in my backpack and it has several uses. It prevents sharp edges from poking me in the back as I am hiking. Once I’m at camp and my backpack is unloaded, it can be used as a large sit pad. I could use it in my top quilt for extra warmth if needed. In the event I have to “go to ground” the foam will provide some insulation from the ground for my torso and the backpack would do the same (probably to a lesser degree) for my legs.

Would I be comfortable using the two items listed above? Probably not. Would it work in keeping me warmer than laying on the ground? Yes. Do these items I’m carrying have multiple uses? Yes.

There is an expression that people “pack their fears.” From my experience, the need to carry anything extra for the sole purpose is “what if” I have to sleep on the ground unexpectedly is absolutely unnecessary.  If research is done before the trip, care is taken to ensure everything is packed before you leave as well as repacked before you leave each location, and your gear is regularly inspected, there will be a very small chance that scenario would happen. If it is a concern, just a few small changes could be made to your current gear to allow for some degree of preparedness.

What are you doing to preparing for “going to ground” from a hammock?

Posted in Backpacking, Beginner Series, Hammock Camping, Helpful information | 1 Comment

Gunsight Falls (Bankhead National Forest) – 2 year adventure

This particular post has taken about two years to actually write. The reason is my hiking buddy and I had heard of this particular mysterious waterfall in name only with very few detail about the actual location several years ago. Since we have seen most of the other major waterfalls in Bankhead National Forest, this one was on our list to see.  We went into detective mode, scouring the Internet for clues of the actual location and/or directions and there were very few. Our schedules go busy with work and family. I finally had a few hours free one Saturday morning. Although I hated to go find this particular waterfall without him, this was probably my only chance this year so I took advantage of the little free time I have and made the decision to go find it.

Following some fairly vague directions, I parked at the gated area for the Kinlock area in Bankhead National Forest. I have always wondered where this road led and I was about to find out. It was interesting that so much money had been invested in this “road to nowhere.”  Evidence of concrete drainage spots were very obvious along the sides of this road. . I headed up the hill and passed the turnoff for Kinlock Shelter. I topped the hill and headed downhill as the road curved to the right and Basin Creek was gurgling on my left. There were some very nice flat and open spots for camping along the creek. I was surprised there were was not any evidence of previous camping such as fire rings, etc.

I continued to follow the road to the right and slightly uphill as it finally curved slightly to the left and crossed Basin Creek. I was expecting the evidence of a large bridge in the past, but it appeared as a simple rock bottomed creek crossing as many of the other old logging roads I have seen in the forest. I was surprised given the time, energy, and money to construct the road up to this point. I retraced my steps back to the point where I first encountered the creek.  I dropped off the road to the creek and found myself at the junction of several creeks.

From memory, I knew my destination was upstream of my current location but I wasn’t sure which creek held my much sought after waterfall.  I decided to head up the creek to my left as I thought I faintly remembered being told it was that direction.  From this point forward, the hiking became a bushwhack without any trail evident except for a game trail or two. 

I headed upstream and after a short time I could hear the distinct sound of a waterfall up ahead just as I passed an old wooden bridge crossing the narrow creek.

Old wooden Bridge

I knew this area was close to private property and I was on the lookout for evidence of “No Trespassing” or “Private Property” signs as well as the presence of red paint. National Forest boundaries are marked with red paint on trees, or yellow signs with black printing. I did see two old metal signs, but I was on the correct (National Forest) side of the signs I observed. I quickened my pace upstream to discover two surprises.  First, I did find a wonderful waterfall. However, my second surprise was it was NOT the waterfall I expected. I have seen several pictures of the waterfall I was trying to find, but this definitely was not it. 

Waterfall #1

I took a quick break and as I looked around, I noticed a metal ladder leading up to a ledge to the left of the waterfall. Knowing this was close to some private property, I assumed it was brought down from area up on the ridge above me. Although I have not seen or heard anyone, I am not one to want to intrude where I’m not supposed to be.  I consulted my map and decided I should have taken the creek to the right instead of the creek to the left at the previous junction. Although I could retrace my steps back to the creek junction, it would be much shorter to follow the bluff around to the north to find the waterfall I was actually out here to see.

As I headed across the creek to follow the bluff around I noticed a set of old wooden steps leading down into the creek and a wooden bench.

OLYMPUS DIGITAL CAMERA

I passed these heading up and around the bluff. I am so glad I made that decision. Within a short distance, I found two more small waterfalls. 

Waterfall #2

The first waterfall was interesting. The water fell a short distance then the water came back under and flowed to the left as you faced the waterfall.

Waterfall #2

I passed this waterfall, and continued the bluff around to the north. In the next drainage, I found another interesting small waterfall. This one had a “slide” above the edge of the waterfall.

Waterfall #3

After many up and downs bushwhacking around the bluff, I finally came to the creek I should have taken earlier and headed upstream. I saw a large bluff on my right and heard rushing water as I neared the end of the canyon. I decided to save that area to explore on my way out. I continued upstream and came upon what I have heard referred to as “Gunsight Falls.” I think the name comes from the narrow area at the top of the falls. It does resemble iron sights on a rifle. While it was a tall waterfall, it honestly wasn’t as tall as I expected. I would estimate it is similar to height as East Bee Falls near the “Big Tree.” I was glad to finally find it but slightly sad my regular hiking buddy wasn’t’ here to enjoy our discovery as we have talked about searching for this waterfall for several years.

Gunsight Falls
Gunsight Falls

I did take a longer break here since I knew I was nowhere close to private property. After a break it was time to head back downstream toward the car with one more area on my list to explore on my way out. As I headed downstream, I headed toward the sound of water I heard on the way in.

I found the source of falling water and was pleasantly surprised. There was a large shelter with a very unique feature. Instead of the water falling over the edge of the shelter as most waterfalls, the water was falling from a fault INSIDE the shelter. The ground inside of the shelter was covered with large rocks that had fallen from the roof, so I took a few quick pictures and left the danger area.

Waterfall #4

I headed back downstream and quickly came to the location to cross the creek and get back on the old road. I climbed the hill and just as I was within sight of my car I saw the first people of the day. They were headed to Kinlock Shelter to have lunch.  I got into my car and headed home. According to my GPS, I had covered about 5.5 miles in a little over 3 hours. About half of the distance was bushwhacking. It was another great day in Bankhead National Forest and one more waterfall was checked off my list of places to go find.

Posted in Trip Reports | 5 Comments

Track my progress real-time on my SPOT GPS Messenger

I’m leaving tomorrow (10/5/2019) morning to drive to Elkmont, Tennessee and begin a 4 day, 35 mile backpacking trip. To show how a SPOT GPS Messenger works, I am sharing my public page where you can track my progress. There will be information displayed when I power up my SPOT GPS Messenger around lunch tomorrow.

Here is the link: https://share.findmespot.com/shared/faces/viewspots.jsp?glId=0V2XG14fKrY4UWEl2bNbWVV4crnvFmuhe

Posted in Backpacking, Beginner Series, Gear Review, Helpful information, Hiking | Leave a comment

My personal backpack packing list/weight planning spreadsheet

I love a good spreadsheet. Here is the one I’m currently using. It does graphs, percentages, and lots of things you may not need.

This information is actually my packing list for a trip I leave on tomorrow to the Smoky Mountains. The plan is 35ish miles in 4 days.

I hope you find the spreadsheet useful. Feel free to download and make your own.

Posted in Backpacking, Beginner Series, Helpful information | Leave a comment